


Mer-velous Mer-friends!
Hi everyone! I am back at the Brutus Monroe blog to show you how you can use your Fallen Snow glitter glaze to create bubbles for underwater scenes! This glitter glaze is not just for Christmas!

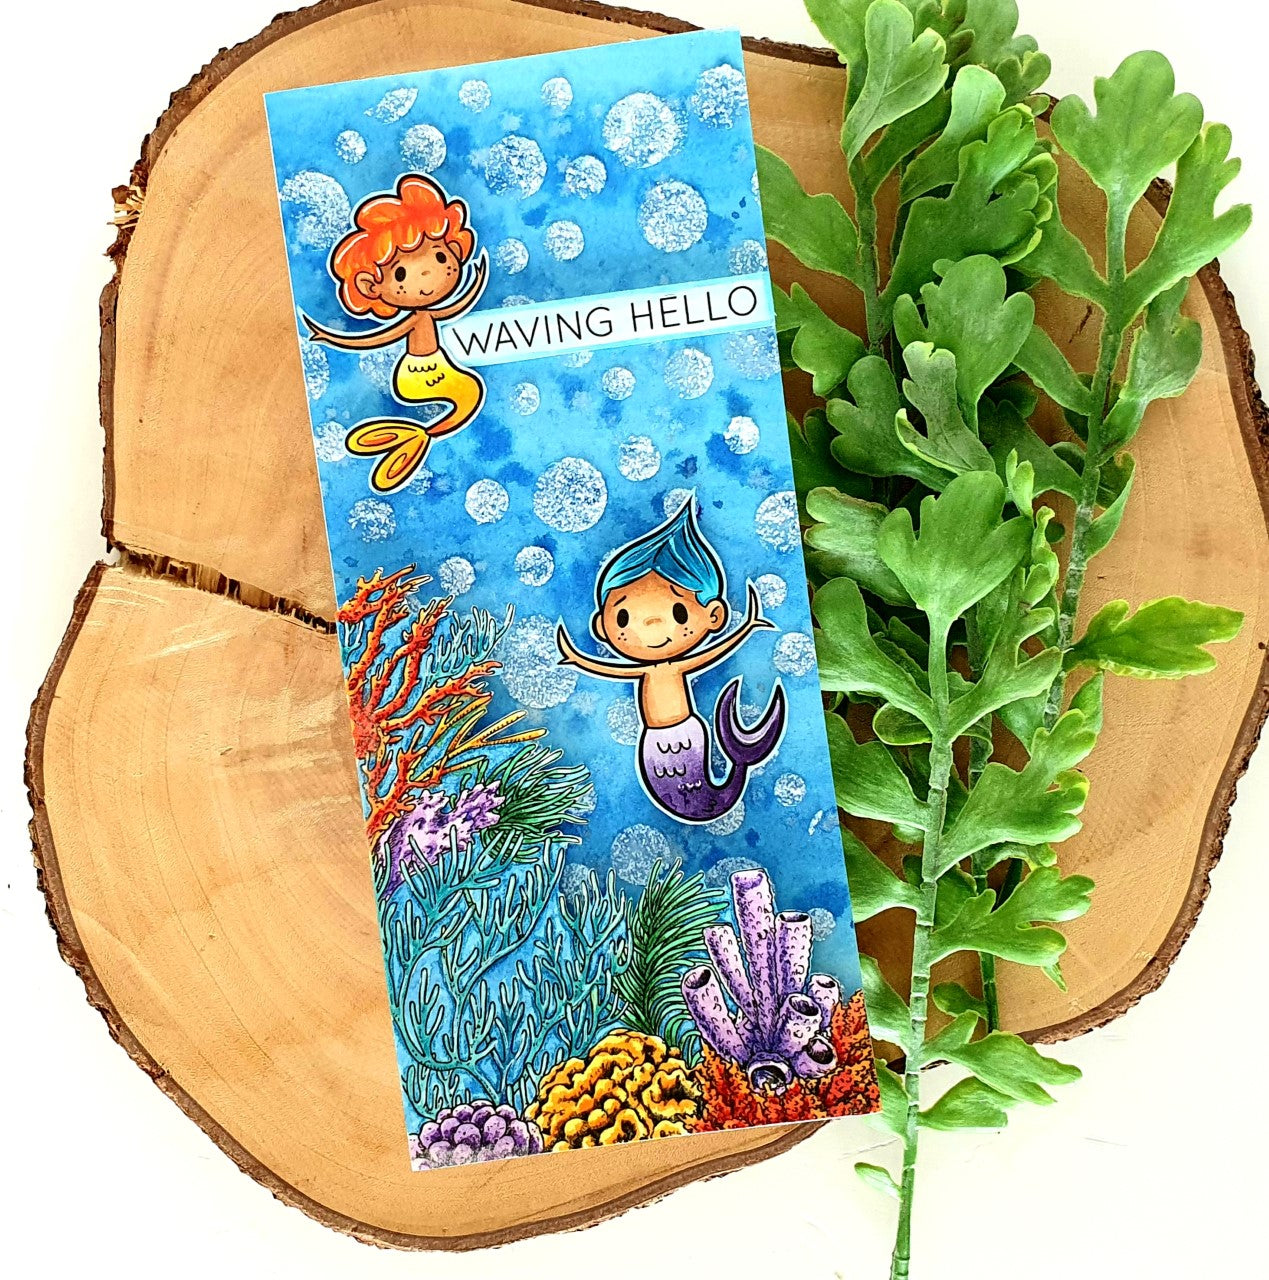
To create this card, I took a 9" X 12" sheet of watercolor paper and cut it vertically in half. I knew I wanted a slim card for this project. I taped my panel at the top and bottom onto my glass mat. I prepped the card by swiping some clean water over from top to bottom using a wide watercolor brush. I squeezed Blue Aqua Sparkle Pigment onto my glass mat and picked up the color with my damp brush and swiped the color across the panel - then I also flicked some of the pigment onto the paper to create some blue bubble effects. You can also mix a little bit of your Galaxy Satellite Silver powder with some water and splatter it all over your card for some extra shimmer.

When the panel is dry, I took the Random Dots Stencil and taped it onto one half of the panel. I used my rubber palette knife to spread the Fallen Snow Glitter Glaze.

I set the panel aside to dry for about 10 minutes. In the meantime, I cleaned off my stencil. Then I taped the panel on the other side of the panel and applied the glitter glaze.

While the panel was drying, I stamped out the two merboys and the “Waving Hello” sentiment from the Merfriends stamp set and colored them with Copics.
I also stamped the Coral Reef background onto watercolor paper. I then water colored it using the different colors of Sparkle Aqua Pigments. I then fussy cut the areas I needed for the bottom of my card panel.

I adhered the background onto a 3.5"X 8" slim line card base and trimmed the excess hanging off the sides. I used foam dots to adhere to the elements onto the card.

Hope you enjoyed my mini tutorial.
Thank you for stopping by!
‘Til next time!
Anna
If you would like to see more inspiration, I would love it if you would drop by my social media links:
Instagram: https://www.instagram.com/craftyannastudio Blog: https://www.craftyannastudio.blog
Facebook: https://www.facebook.com/craftyannastudio Pinterest: https://www.pinterest.com/craftyannastudio You tube: https://m.youtube.com/channel/UCk9Fo_v9bL8DXGMNO8IrWfw/
Comments
Leave a comment