


Ink Smooshed Popsicles- Using Digital Cuts on Your Cards
Hello, crafty friends! It's Marie Nicole here with my first post for Brutus Monroe. I was sucked into the world of papercrafting in 2010 when I saw all the amazing things that are possible with stamps and inks. Cardmaking is what I mostly do, but I also love scrapbooking, a little mixed media, and DIY home decor projects. Along with Brutus Monroe, I also blog over at Canvas Corp Brands and on my own personal blog. I am so excited to be here and I am already loving all that Brutus Monroe has to offer, especially these digital cut files!
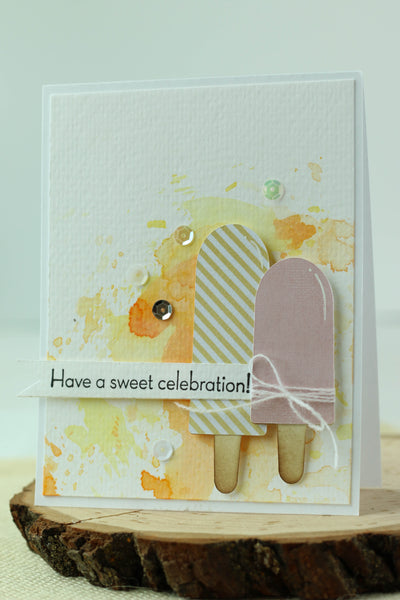
If you haven't checked out the Digital Cut Files yet you need to! Most of the files coordinate with the stamp sets and are totally FREE. For this card, I downloaded these cute little Popsicle SVG files, cut them out with my Cricut, and used them to layer on my card.
I started out by taking my popsicle die cuts and inking the sticks on the bottom with a little Antique Linen and Gathered Twigs Distress Ink. Then, I set the popsicles aside as I began to work on my background.
For the background, I knew I wanted to use a fun ink smooshing technique. I cut a piece of watercolor paper down to just slightly smaller than my card base. Then, I used a piece of acetate to pick up some ink that I mixed with water and "smooshed" it onto the watercolor paper. The Distress Ink colors that I used for this were Dried Marigold, Spiced Marmalade, and Mustard Seed. Ink smooshing is such a fun and simple technique to do! After I applied each color I hit it with my heat tool so I could get lots of fun layers of color. You really can't go wrong with ink smooshing- I'd encourage you to try it if you havent already!

When my background was dry, I adhered the popsicles on with some foam adhesive, and then stamped the sentiment on a strip of the same watercolor paper that I used for the background. I slipped the sentiment behind the little popsicle and adhered it down.
The last thing I did was I added some white sequins here and there for some sparkle!
The fun thing about this card is you could totally change it up if you wanted to- use different colors to make your card more masculine or feminine, depending on who you are planning to give it to!
I also managed to make a process video of this fun little card, so if you want to see how it was made, just sit back and watch!
Thanks so much for stopping by and happy crafting!
Comments
Leave a comment