


Fairy Garden- Stamps by Rita Barakat
In the May Release, there were two new stamp sets available that were designed by the talented Rita Barakat! These stamps are definintely designed in her fun, whimsical style and they both have a fairy theme to them. There is a background stamp, FAIRY GARDEN, and a 4x6 set with a number of fairy themed images called FAIRY MAGIC. Let me just say that if you like coloring and building bright, fun cards and projects, you will definitely want to check these out!

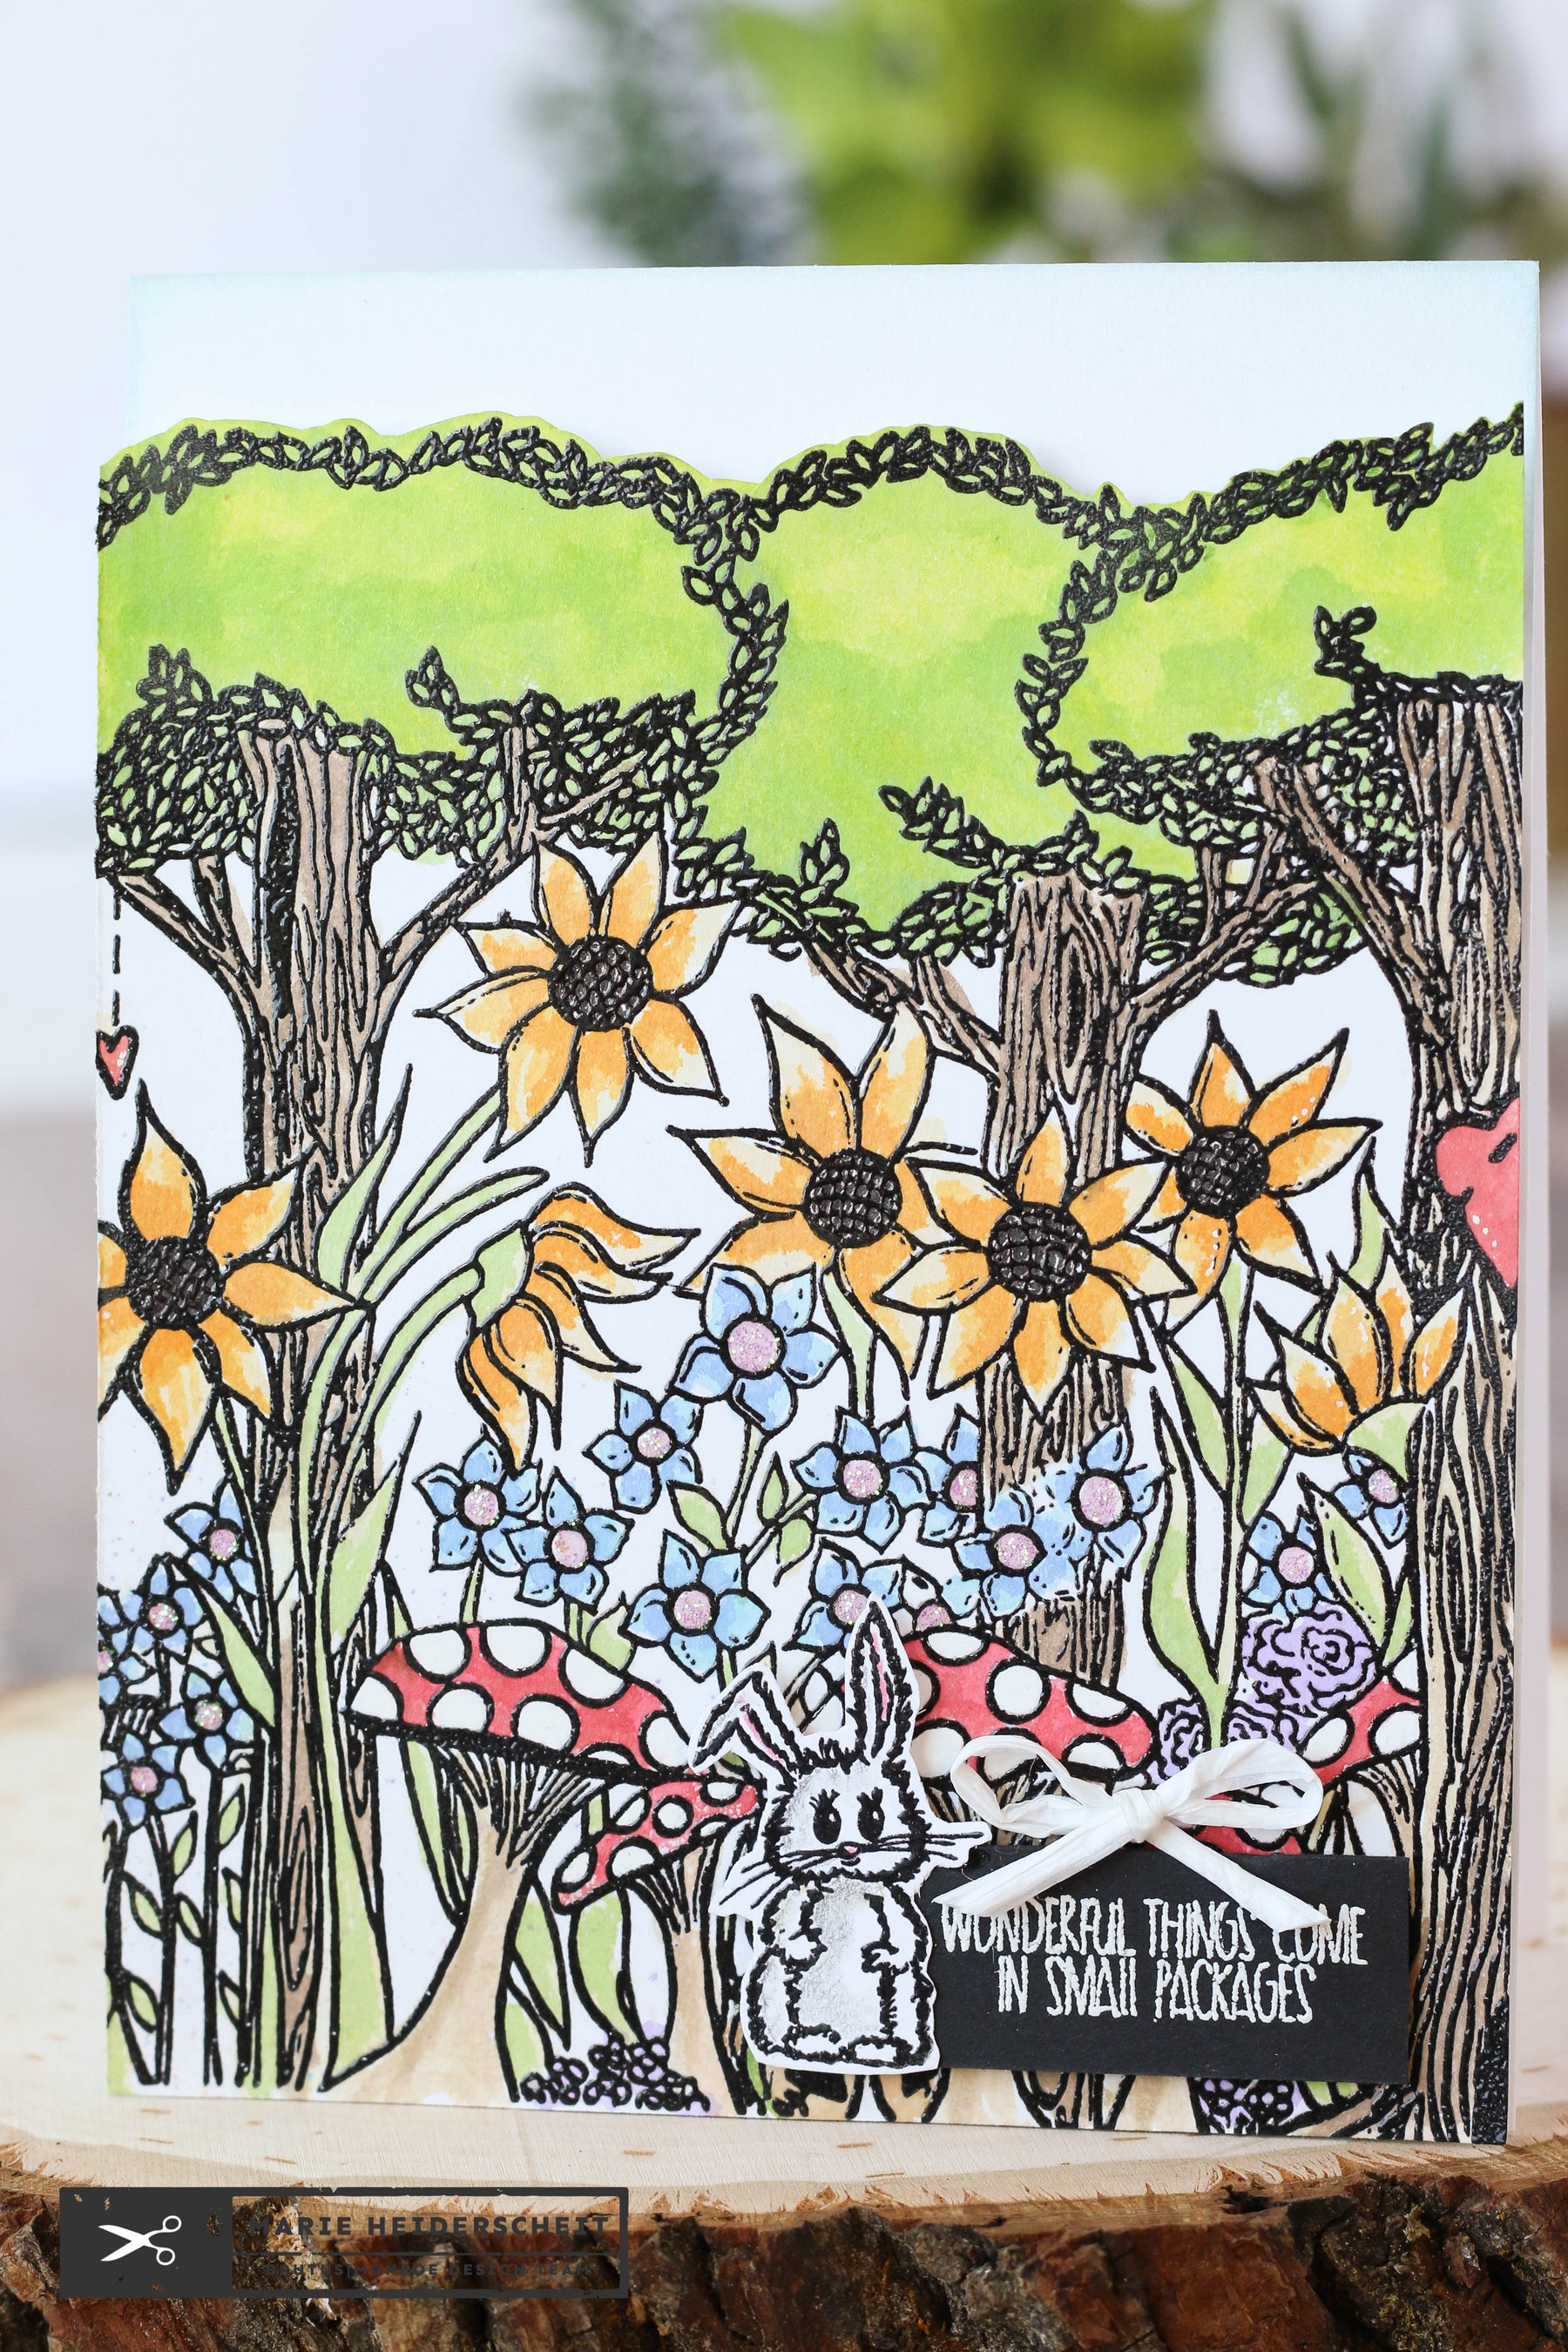
This first card I created I combined both the sets, but focused mostly on the FAIRY GARDEN BACKGROUND stamp. I used my Misti to stamp this image and then embossed it in RAVEN EMBOSSING POWDER. I planned on watercoloring and embossing the lines always helps me get cleaner results. After the image was embossed, I watercolored it using a variety of Distress Inks. Then, I cut the image down to an A2 card size, and trimmed along the tops of the trees, as well. Then, I adhered the image to the front of a white card base using some kids craft foam to add dimension.

I then took my FAIRY MAGIC stamp set and stamped out the bunny and colored him with Prismacolors. I added the bunny along with a sentiment to the bottom right of the card and then added a little raffia bow. The background definitely does most the work for this card, so I decided to keep the sentiment simple!
For my next card with Rita's stamps, I used the FAIRY MAGIC set and built a fun, colorful A2 card, as well.

This card makes me think of my niece, since its full of color and Im sure she would love the fairy image along with the bunny. I stamped out the bunny and fairy, embossing them in RAVEN POWDER, and then colored them in with Prismacolors. I then fussy cut them and set them aside to work on my card base.
I used some plain white cardstock and ink blended on some Distress Inks to create the colorful background. Then, I stamped on the magical fairy dust image along the middle of the card using some RAVEN DETAIL INK. To add some shimmer, I used some Tattered Angels Pearl Glimmer Mist and gave the whole background a light spritz. 
With the background done, I just embossed a sentiment onto a vellum circle, added my colored images with some foam adhesive, and then adhered it to the card. I took a white gel pen to add some marks along the outside edge of the vellum circle to help it stand out. Such a fun, colorful card but putting it together was really very simple!
Hope you enjoyed a look at Rita's amazing sets! Dont forget to go check them out in the store, I'll include some links below!
Until next time,
Marie Nicole
BLOG
INSTAGRAM
PINTEREST
YOUTUBE
FACEBOOK


More from Marie Nicole...


Leave a comment