


Camouflage with Down Pour Stencil
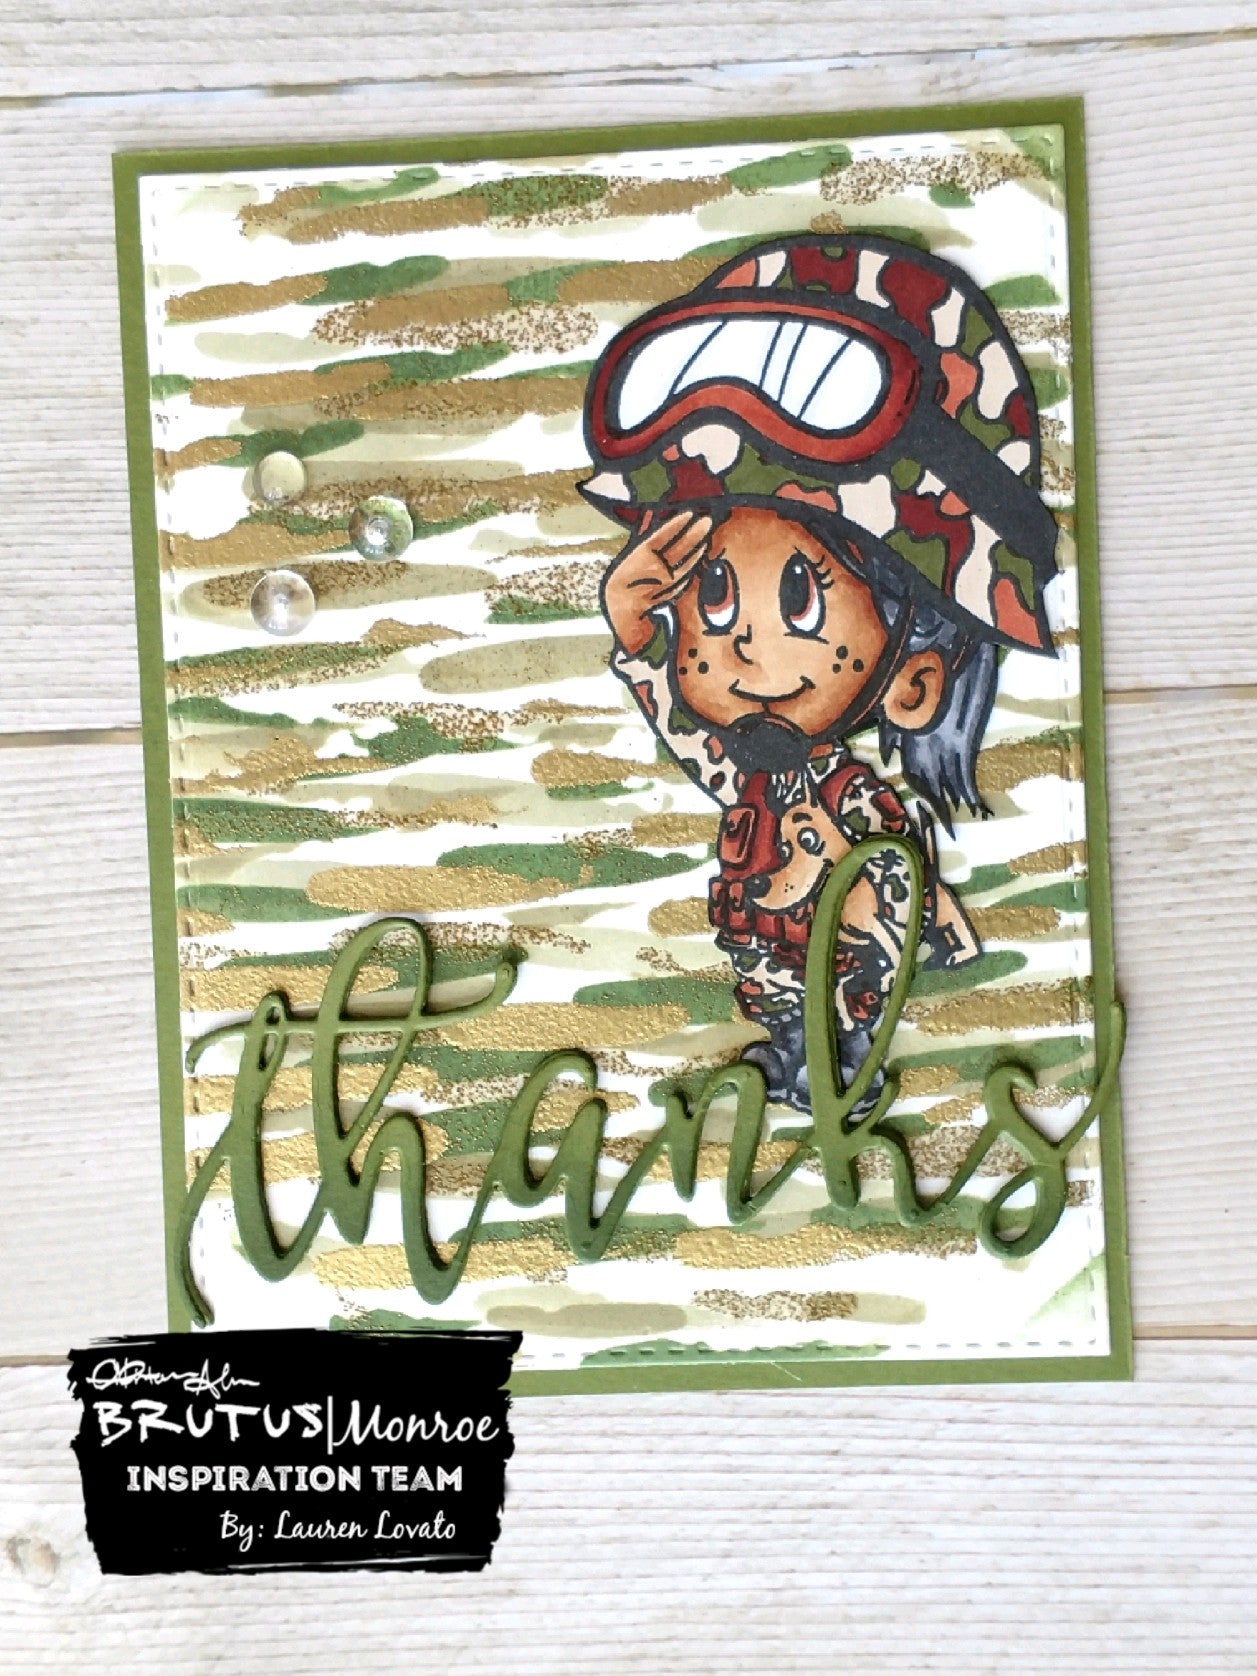
Hi crafty friends! Lauren here, sharing a technique using the Down Pour stencil to make camouflage! I'm sharing a card that I made for my father-in-law who is retiring from the military this month. This card with the young soldier will be from my daughters to him, with a message thanking him for his service on the inside.


To make this background I took a piece of 4 1/4 x 5 1/2 Alabaster cardstock and secured it onto my craft mat with some rolled purple tape on the back. I positioned the stencil over the paper at an angle, so that the streaks are actually horizontal, instead of going down the page. I used a foam tool to blend the surface ink color Sage, and then flipped the stencil upside down to blend with the Jurassic surface ink. When flipping and positioning the stencil, I tried to make sure that the openings in the stencil were positioned over blank areas on the paper, in order to ensure everything got filled in. After finishing with the inks, I rotated the stencil 180 degrees and again positioned it over a lot of white space. I used the Brutus Monroe embossing ink directly from the ink pad and squished it down all over the stencil. I actually forgot to use an embossing buddy on the cardstock first, but in the end it didn't matter because the look is not supposed to be perfect clean lines. When I lifted the stencil off, I used the Sand Castle embossing powder all over the page, and then heat set it. I flipped the stencil again, and sponged the embossing ink one more time, covering it this time with Gilded embossing powder.
It is important to flip and turn and shift your stencil with each ink color or embossing powder color, so that the shapes don't look exactly the same.

The young soldier is the "When I Grow Up - Military" stamp. I stamped it first in Raven detail ink and colored her using copic markers. I used the "thanks" die to cut Jurassic cardstock three times, and layered them together for some dimension. On the top layer I gently blended some Jurassic surface ink on the bottom half of the word. I adhered the soldier down first, and then layered the word over the top. I stuck the whole thing to a slightly larger piece of Jurassic cardstock and added a few acrylic bubbles at the end to finish it off.
Please share your creations with Brutus Monroe products and don't forget to use the hashtags #BrutusMonroe and #CreateYourOwnEnding !
Comments
Leave a comment