


Foiled tangled waves 3 ways: feminine, masculine and unisex
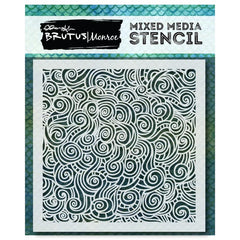
Hi everyone! It is Verity here again from Pretty Little Button, so good to be back up on the blog again. All week long Brutus Monroe has teamed up with Therm-O-Web to show how well both their products fit together. The cards I feature today in use transfer gel, foil and a stunning Brutus Monroe stencil. I absolutely love this stencil, I think it is my most favourite stencil from Brutus Monroe. And when I saw Thermoweb week coming up, I knew I had to use it.
I have created 3 cards today to show how you can still use the same stencil and idea, but change it up to get three different looks: feminine, masculine and unisex. If I had to choose though, my favourite is the 'Bonjour beautiful' card. Penny embossing powder and Apricot ink pair so well with Therm O Web 's Rose fold foil. It is a match made in heaven. So if you're ready, read on!
*For supplies featured in this post, please refer to the links at the end of the post.
Foiled tangled waves 3 ways - Feminine card details:
To start off, I blended Brutus Monroe Apricot ink onto a white card panel. My advice is to start off lightly as you can always add more ink, but you cant take it away. When ink blending with Brutus Monroe inks I never had problems with harsh lines, even if I don't start off the edge. Next, adhere the Tangled stencils down over your card panel with Therm O Web Purple tape, and using a palette knife, apply decofoil Transfer gel over the stencil. I applied the gel in the same pattern as I applied the ink.

Allow this to dry so the gel turns from white to clear. It must be clear before you can foil. I cut a piece of rose gold foil down so that it was large enough to cover the dry gell area and sent this through my Minc machine on heat 3 setting. Alternatively, you can use a laminator if you have one. Here is the bit that never tires, the reveal! To finish this card off, I heat embossed inPenny the Eiffel tower from the 'From Paris with Love' stamp set onto vellum. I also stamped and heat embossed the 'Bonjour' onto white card.
I die-cut the word beautiful onto white cardstock which I had blended the same Apricot ink over to match the background. This sentiment was foam mounted to add dimension, and I applied a small strip of toner rose gold foiled card to help anchor the sentiment. Lastly, I embellished with Nuvo drops. The whole card panel was foam mounted onto a white card base.

Foiled tangled waves 3 ways - Masculine card details:
This card started off similar to the previous by ink blending Blueprint Sketch Distress Oxide ink onto grey cardstock. Once again transfer gel was applied through the tangled waves stencil and left to dry clear. This time, silver Decofoil was used to contrast with the dark colour cardstock. To finish the background off, silver paint was splatter onto the panel.

The sentiment was heat embossed in Sterling embossing powder onto a stitched vellum circle - this stamp is from the Birthday Badges stamp set. The sentiment was anchored onto the card with some corresponding strips of card and a little bit of Brutus Monroe craft glue was applied behind the embossed writing. The whole card panel was foam mounted onto a grey card base.

Foiled tangled waves 3 ways - Unisex card details:
This final card was a very quick card like the others. I ink blended squeezed lemonade distress ink onto Kraft card to soften the appearance once foiled. Once again I used the transfer gel with the Tangled waves stencil, and cover a larger area. This was the foiled with Gold Decofoil.

A couple of pieces of twine was added to the bottom of the panel to help anchor the Gilded embossed sentiment. This sentiment is once again from the Birthday Badges set.

Supplies:


Fell free to leave a comment below - I would love to hear what you think!
For more inspiration, please feel free to pop over to www.prettylittlebutton.com Or you can follow me on Instagram, Facebook, or Pinterest.
Till next week,
Verity!
Comments
Leave a comment