Check your Rewards Here!

A Colorful Thank You Card
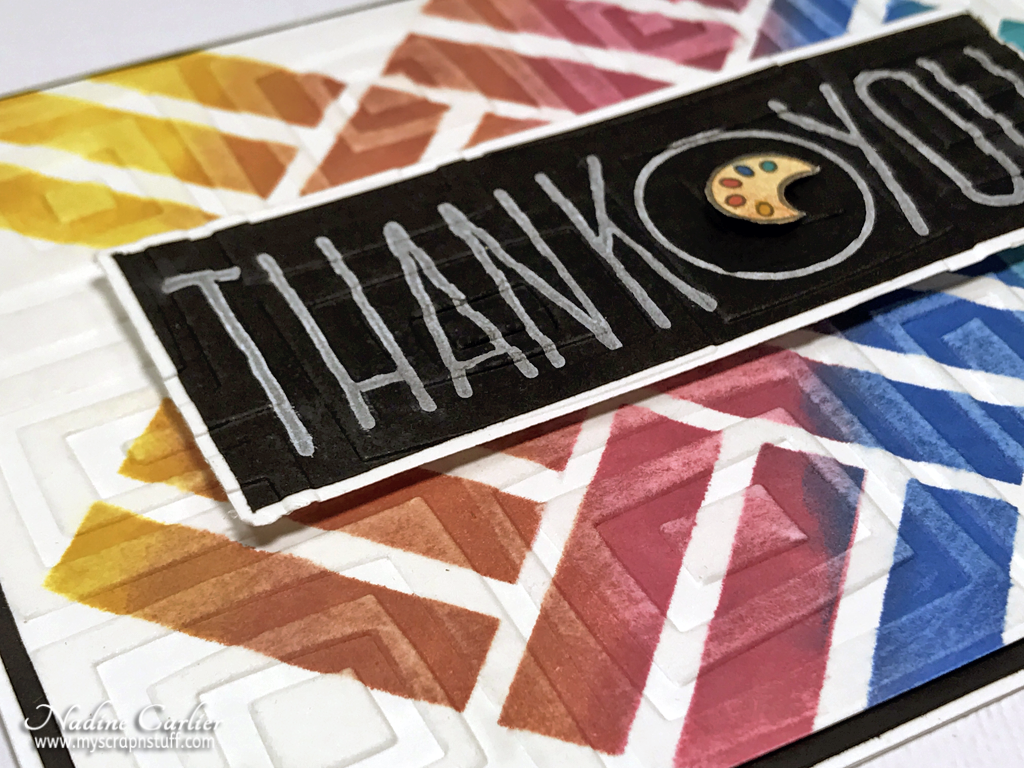
Hello! Happy Friday! Nadine here again today sharing how I created my colorful thank you card. These cards are great to make in advance and add a special little stamped image in the middle of the circle to personalize it for the occasion when you are ready to use the card. I will show you how below.....

First I taped down the Tile Mixed Media Stencil with some washi tape over a piece of white cardstock. Then using some sponge daubers and the Premium Chalk Ink in Cornflower, Oz, Phonebook, Rouge, and Terracotta I daubed the inks over the stencil to created a blended rainbow effect.

Next, I embossed the inked cardstock piece with an embossing folder. Then I sprayed some Squeaky Clean Stamp Cleaner on a paper towel and lightly rubbed it over the raised areas of the embossed cardstock. As the cleaner dries, the ink will lighten up slightly. I also used the Squeaky Clean Stamp Cleaner to clean the ink off of my stencil; it looks as good as new again.

I then matted the piece with black cardstock and adhered it to my card base. Then using the Many Thanks Stamp Set I stamped the sentiment on a piece of black cardstock using the Alabaster Pigment Ink. Matted the sentiment piece with white cardstock and then embossed it with the same embossing folder I used for the background piece. Adhered the sentiment piece to the center of my card with some 3D foam squares.

On a small scrap piece of white cardstock, I stamped the paint easel from the School Day - Planner Set Stamps and then colored it in with the same inks I used on the background piece. That is what is so fun about the Many Thanks Stamp Set; you can use any tiny stamp to personalize your card. You are not just limited to only use the little stamps that come in the set.
Once I got my little paint easel colored, I used a small 3D foam square behind it and popped it up in the middle of the thank you circle.


Thank you so much for visiting! I hope I inspired you to give it a try and happy crafting!
Click On The Images Below For The Brutus Monroe Supplies Used


Leave a comment