


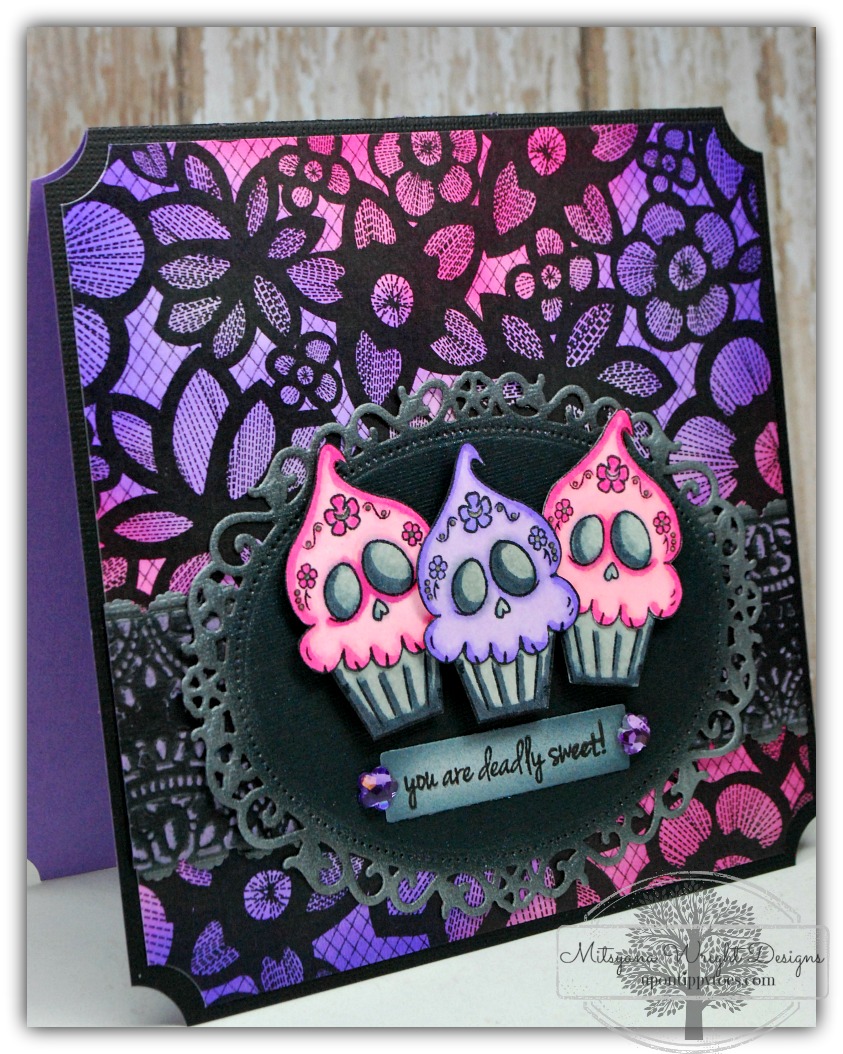
You Are Deadly Sweet!!

Hello crafty friends!! DT Mitsy here!! And today I have something special for you all...
My very first project for Brutus Monroe Stamps!! And even better I get to use the AWESOME new Serena Bee Deadly Desserts stamp set! EEEEEKKK!!
Ok, if there's one thing you must know about me it is I absolutely LOVE Halloween!! I would celebrate it everyday if I could!! It is my most favorite holiday of the year... I love it even more than Christmas!! And it doesn't help that my birthday is the day before... which just extends my celebrating!! YAY!!
So, this was an absolute WIN-WIN all the way around!!

Tools & Supplies
Brutus Monroe's Deadly Desserts (Serena Bee Collection)
Spellbinders Nestabilities Floral Ovals
Xyron Creative Station w/ 9" Permanent Adhesive Refill
Cut'n'Boss
Core'dinations Black Magic Whammy
Canson 150lb Illustration Paper
Spectrum Noir Markers (HB1, HB2, HB3 PP2, PP4, PP5)
DCWV La Bella Rouge Stack
Bazzill Cardstock
Momento Tuxedo Black Ink Pad (Tsukineko/ Imagine Crafts)
Anna Griffin Fransesca Lace Embossing Border Folder
EK Success 3D Dots
EK Success 2-way Glue Pen
Rhinestone Flowers
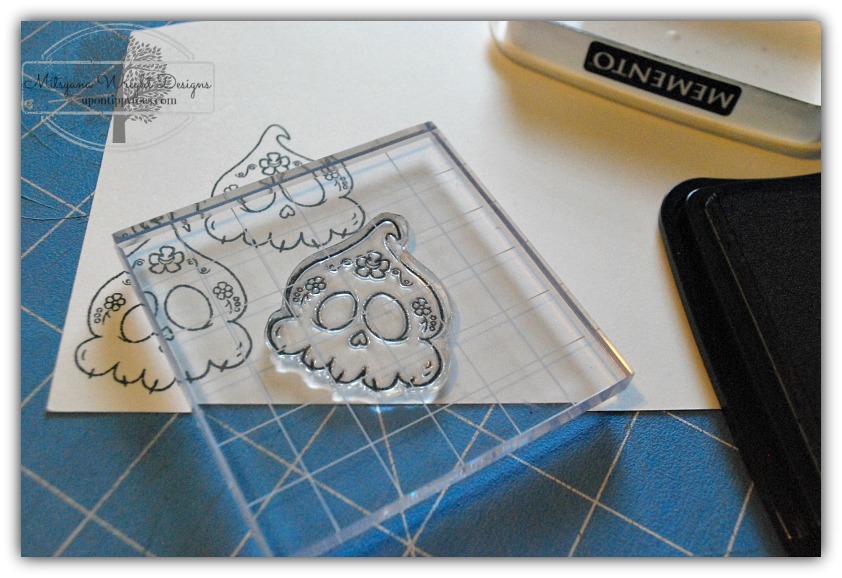
First, I stamped my image with Momento's Tuxedo Black ink. I'll be using alcohol ink pens to color my image I need an ink that won't bleed when it comes into contact with it and since it's India Ink base it dries permanent. I stamped my image onto illustrator paper because this paper was made for comic and manga artists and made to withstand saturated coloring and control bleeding from alcohol ink markers.
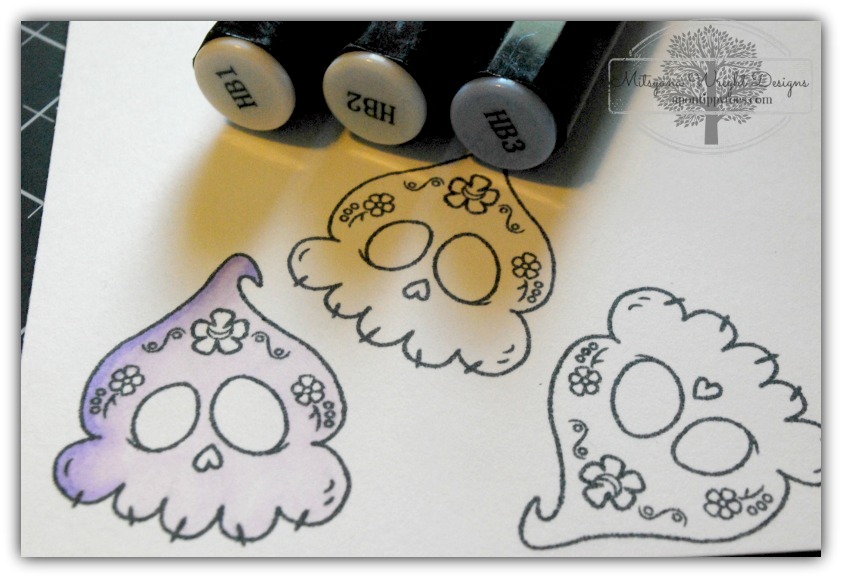
I used My Spectrum Noir Markers in HB1, HB2, HB3 for the purple ones and to color my cupcake tops. And colored the bottoms in BG1, B2, and BG4 for the bottoms. I also cut a a1/2" x 2" rectangle and stamped my " you are deadly sweet" sentiment on it.
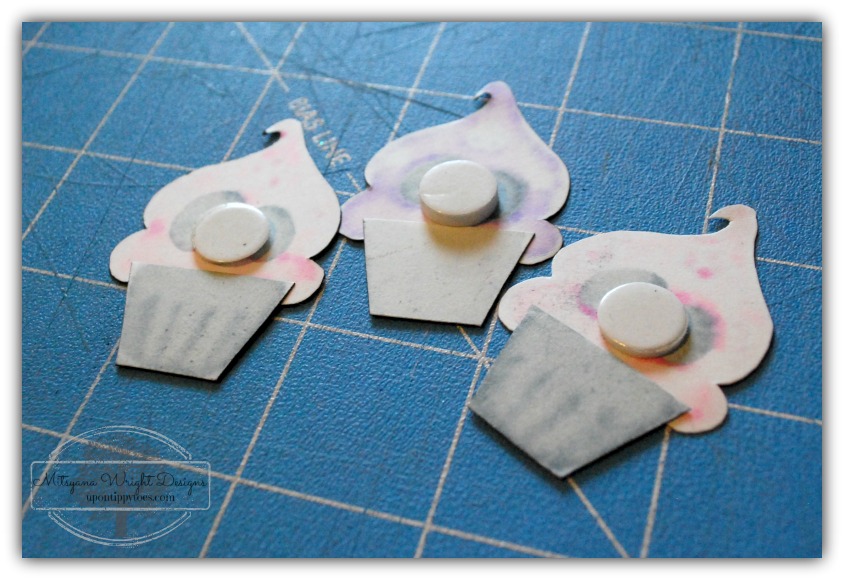
I "fussy cut" each piece and adhered the pieces together with my glue pen. Then attached a foam dot on the back of each to add dimension.

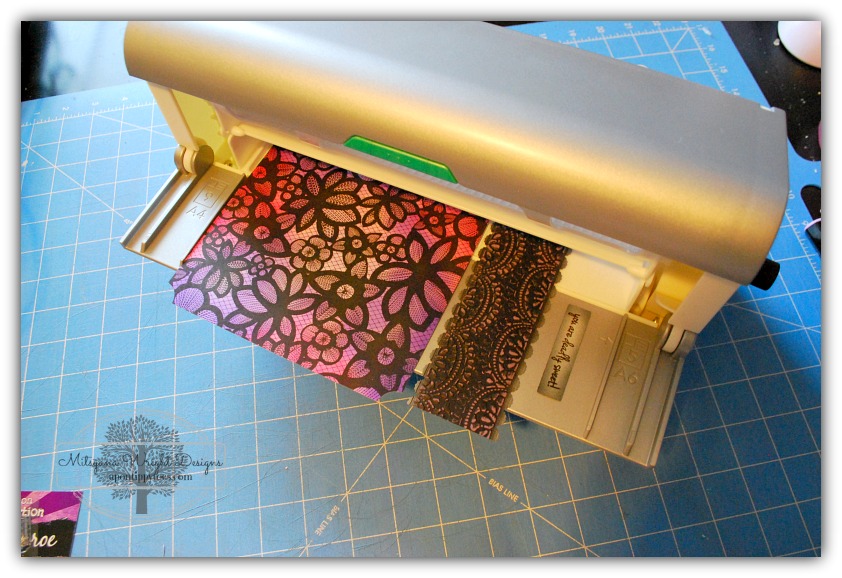
For the background I used a sheet of paper from DCWV's La Bella Rouge Stack and airbrushed it with my eBrush machine in Spectrum Noirs PP2, PP4, HB1, and HB2. Working in chuncks at a time first applying the lights then the dark colors around the edges.
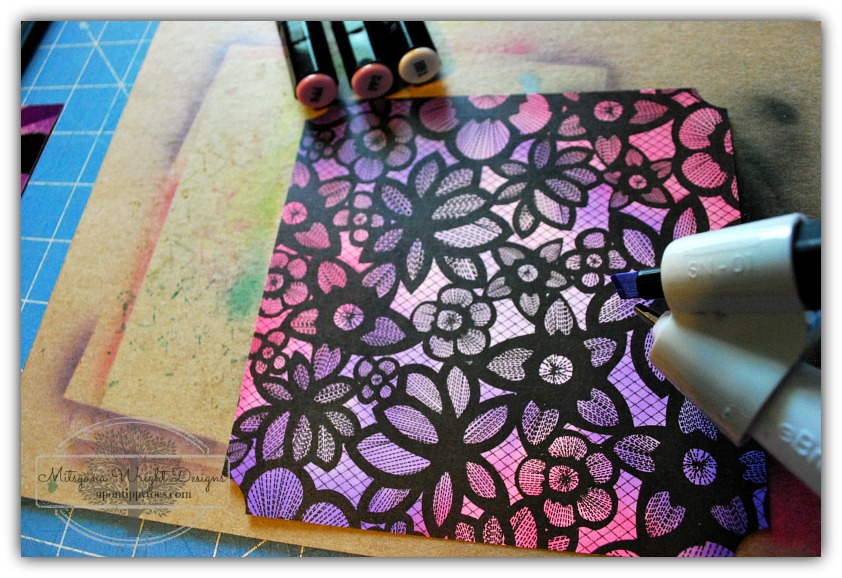
I left the center white for a nice highlighted area.
I also airbrushed the edges of the little rectangle in BG4.
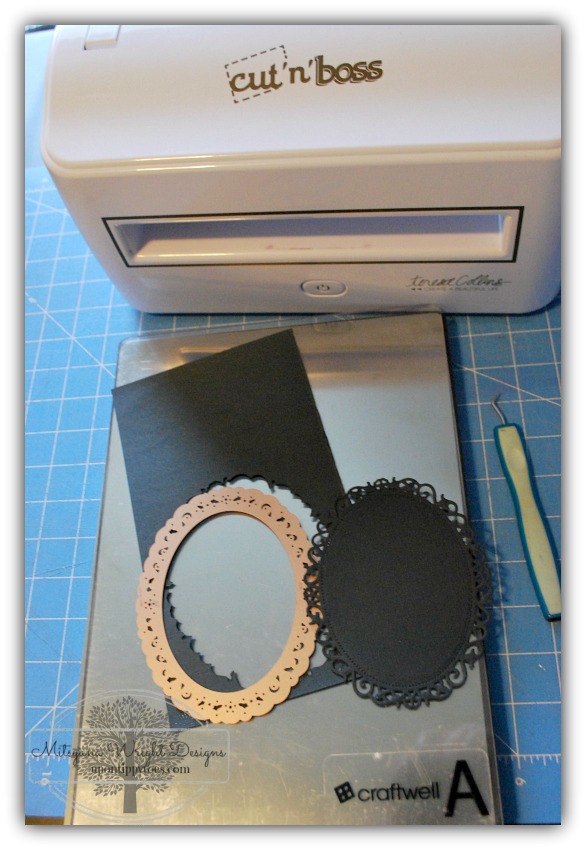
Here, I used my Cut'n'Boss machine and the largest of my Spellbinders Floral Oval to cut a shape out of black cardstock.
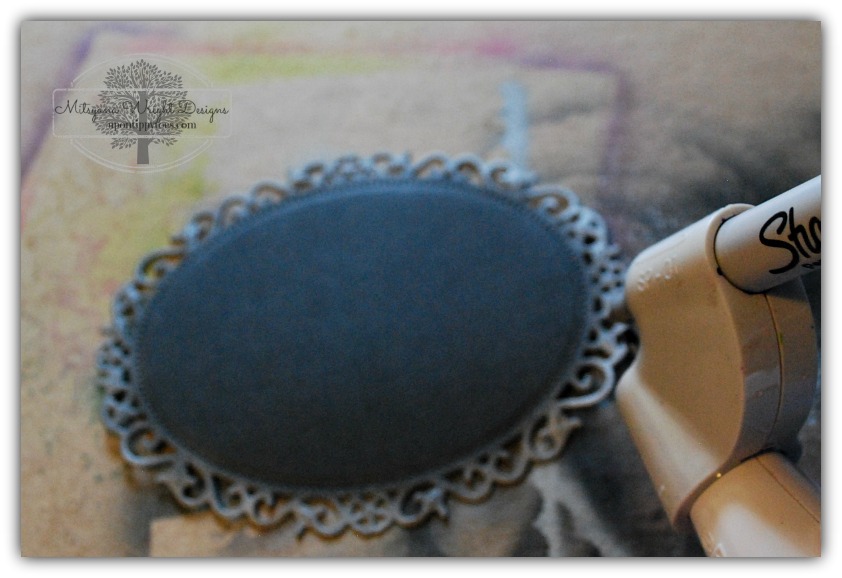
Then I airbrushed the edges of my die cut with a silver metallic Sharpie. I do this because I'm using a lot of dark colors in my card and I didn't want my black cardstock to blend in and get lost from all the black in the background. So adding the silver around the edges gives the oval some definition.
I also ran astrip of Black Magic Coredinations cardstock through my Anna Griffin border die along both edges to emboss my strip. Then I sanded the raised parts off to expose the color underneath.
Finally, I ran my my panels through my Creative Station and assembled my card. As a final touch I added a couple rhinestone flowers.
Here is my final card...
Hope you enjoyed this project and have a very crafty day!!
~ DT Mitsy

Leave a comment