


Ladybug Love
Ladybug Love
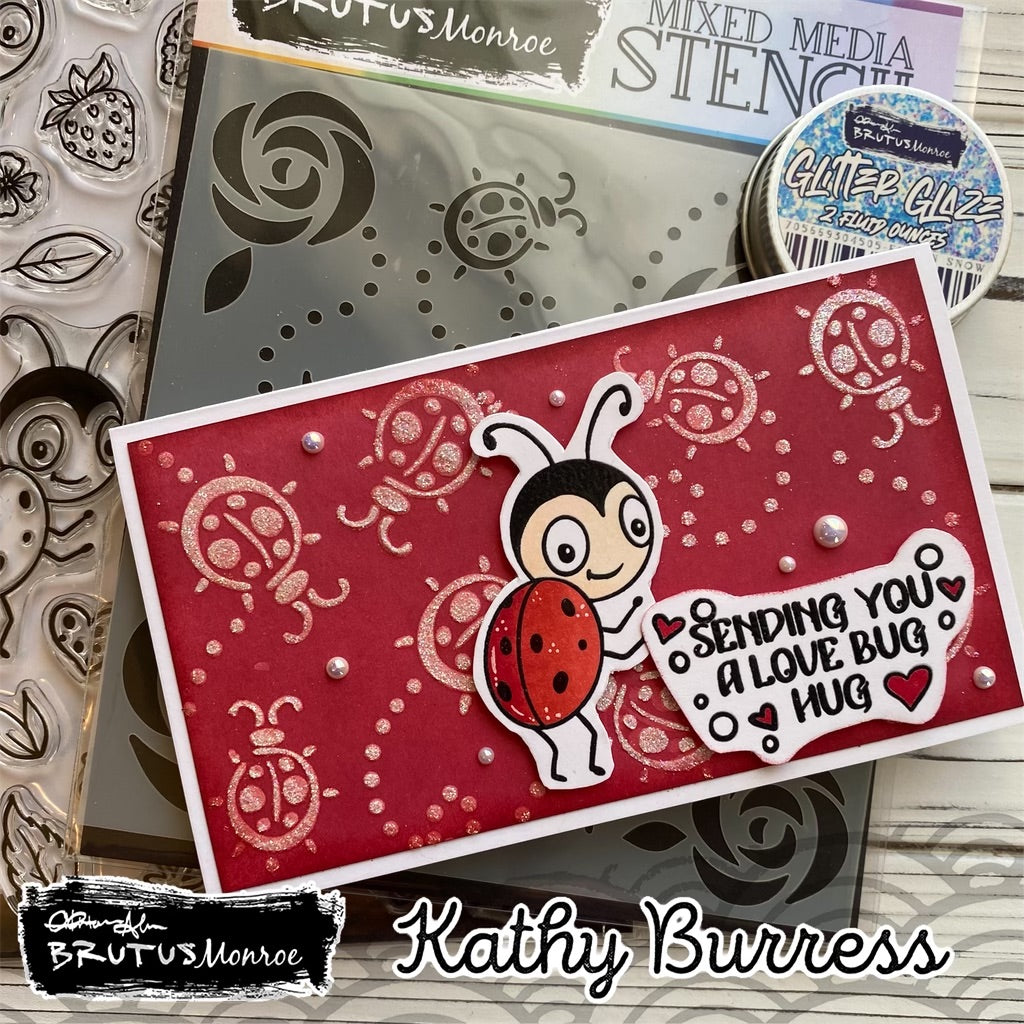
Hello friends! Kathy here spreading some love with the super fun new Lovely Ladybug stamps and Ladybug Roses stencil.
Here are the supplies you will need to get started:
- White mini-slim card base, 6 x 7, scored at 3 ½ on long side
- Red mini-slim layering panel, 3 ¼ x 5 ¾
- Perfect Blend Alcohol Marker Cardstock
- Lovely Ladybug Stamp Set
- Ladybug Roses Stencil
- Fallen Snow Glitter Glaze
- Raven Detail Ink
- Red dye ink
- Coloring medium of your choice, markers or pencils
- White gel pen
- Double-sided tape
- Liquid adhesive
- Foam tape
- Pearl embellishments
Place the ladybug stencil on the red layering panel, rotating to use as many ladybugs as possible. Mask off all areas not being used. Using a palette knife spread glitter glaze over all open areas.

Carefully remove the stencil and set aside to dry. Clean stencil so it is ready to use again for the second layer of glitter glaze.
Select the stamps you will be using on the card from and set up in stamping platform.

Use Raven Detail ink and stamp. Repeat, if necessary, to achieve a uniform dark image.

Use some of the small accent images to frame the sentiment and stamp.

After the first layer of glitter glaze is dry, place the stencil on the red panel, rotating to cover as much open areas as possible. After masking, add a second layer of glitter glaze. Set aside to dry.


Using the color medium of your choice, color the ladybug and accents around the sentiment. Use a white gel pen to add little pops of dimension on the ladybug.

Fussy cut the sentiment and ladybug or use the coordinating die.
After all glitter glaze is dry, use red ink and a fingertip sponge to apply a frame of red around the outside of the layering panel. This will add interest and dimension to the finished card.
 Adhere the red panel to the front of the card base with liquid adhesive or double-sided tape. Use foam tape on the ladybug and sentiment to pop up and adhere to card front. Use some pearl embellishments in any open spaces that need a little something extra.

I hope you will give glitter glaze a try with your stencils, it is such a fun way to create a background panel.
Leave a comment