


Barnyard Fun
Barnyard Fun
Hello friends! Kathy having fun in the chicken coop using the new Chick Chick Hooray! stamp set and Fence Builder dies.
Here are the supplies you will need to get started:
- Mini-slim card base
- Chick Chick Hooray 2x3 Stamp Set
- Fence Builder Die Set
- Chroma Mist
- Square Foundations Dies (1.5 inches)
- Circle Foundations Dies
- Watercolor paper
- Water mister
- Paint Brush
- Double-sided tape
- Liquid adhesive
- Foam tape
To make the backgrounds needed for the grass, chicks and coop, you will need one piece of watercolor paper for each. The grass and chicken coop need to be about 6 inches long, so they will fit on the front of a mini-slim card base. The paper for the chicks can be a scrap as long as it is big enough to stamp 6-8 chicks.
Start by misting the paper with just water enough to wet the surface.

Add a several sprays of Chroma Mist and then add a little more water to help the color move. I also used a paint brush to evenly spread the color over the entire panel.

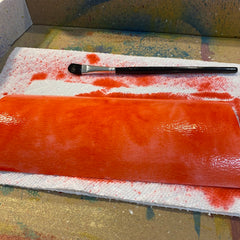
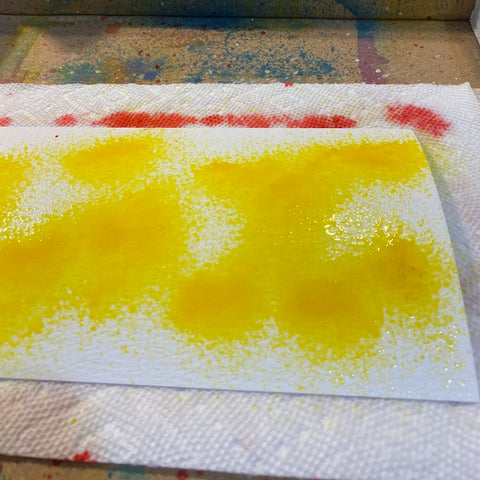
To give the grass some color variations, I used Yellow Green and Leaf Green.

Allow the panels to dry. You can also use a heat tool to speed up the process.
Splatter undiluted Chroma Mist on each panel in the matching color to add dimension.


Trim the red panel to fit the mini-slim card based (5 ¾ x 3 ¼). With the 1.5-inch square die cut three holes in the red panel for the chicken coop, do not throw away the cutouts, you will need them! I actually taped mine in place to keep them together.

Use a grass die to cut a thin border from the green background.

Stamp several of each chick on the yellow background and fussy cut each one (or use the matching dies, if you have them).


Cut 12 picket fence posts with the Fence Builder dies out of white cardstock. Also cut the a strip of white cardstock 6 x ¼ for the horizontal support of the fence.

Layout the fence posts on the red panel and space to your liking. Adhere the posts, making sure the pointed tips are even. Any extra length can be trimmed off.

Add the horizontal support, trimming extra on both sides. Glue the grass in place.

With the cutouts in place, position the red panel on the card base. Use a low-tack tape to keep the barn wall in place. Glue each cutout in place.

Glue the chicks in various positions around the window panels.

Place foam tape on the back of the red panel edges and around the windows for added support.

Remove the tape backing and carefully position the barn wall on the card panel framing each window.
Stamp the sentiment on a scrap of white cardstock and cut out with a circle die. You can edge the circle with a little red ink to help it pop. Adhere to the card front.

Chick Chick Hooray! your card is ready to brighten a friends day.
Leave a comment