


3D Christmas Trees with Chroma Mist
Hello friends! Kathy here today sharing a fun Christmas project using Chroma Mists to make 3D holiday trees which can be used in so many ways in your seasonal projects.
Here are some the supplies you will need to get started:
- Evergreen Builder Standalone Dies
- Watercolor paper
- Chroma Mist, Noble Fir and Bumblebee Yellow
- Alabaster reinker
- Paint brush
- Water mister
- Splatter brush
- Craft heat tool
- Small jewel or pearl embellishments
Using a small piece of watercolor paper, spritz with Bumblebee Yellow Chroma mist. This will be used to cut the stars, so the more you are cutting, the larger the area you will need to cover. Allow to dry or if you are impatient, like me, you can use a heat tool to speed up the process. Once the first side is dry, repeat the process on the reverse side…. Since the stars are visible from all sides you want them to be solid yellow. 
For each tree you want to make, you will need to die cut two pieces, so be sure to use enough paper to cut all the pieces needed at one time.
Spritz watercolor paper with a light coat of water, then a few shots of Noble Fir Chroma Mist. Use a paint brush to spread the color out for an even coat of green of the whole piece of paper. Allow to dry and repeat on the reverse side. Both sides should now have a single layer of green.


Dip a splatter brush in the Chroma Mist bottle or place some ink in a well of a paint palette. Randomly splatter on the first side of the green paper. You should have a good assortment of dark green spots. Allow to dry and repeat on the reverse side of the paper. Place a puddle of Alabaster reinker in a paint well, or on your work surface, and splatter both sides of the trees to look like snow. Add as much or as little as you like. Using the reinker creates true white splatter. If you dilute regular ink with water to get a splatter consistency your snow will be pale and may disappear into the background. Be sure to repeat on both sides.
 Time to die cut… you need two pieces of each size tree and one star.
 Each tree piece needs to be slit down the middle, to allow for assembly. One piece is cut from the trunk up and the other from the treetop down. (Shown on white paper for better visibility.) The tree should remain connected, DO NOT cut in half.
 Slide the two pieces together at 90° angles. The two pieces should match at the bottom so the tree will stand freely. Place a small dot of liquid glue at the center point of the trunk. Hold for a minute or two to allow the glue to set.


The star has a tab at the bottom, you will want to cut most of it off, leaving only a small amount for attaching to the treetop. Place a small dot of liquid glue on both sides of the tab and insert on one side of the treetop. You can also place a small dot of glue on the other side of the treetop junction to adhere all the pieces in place.


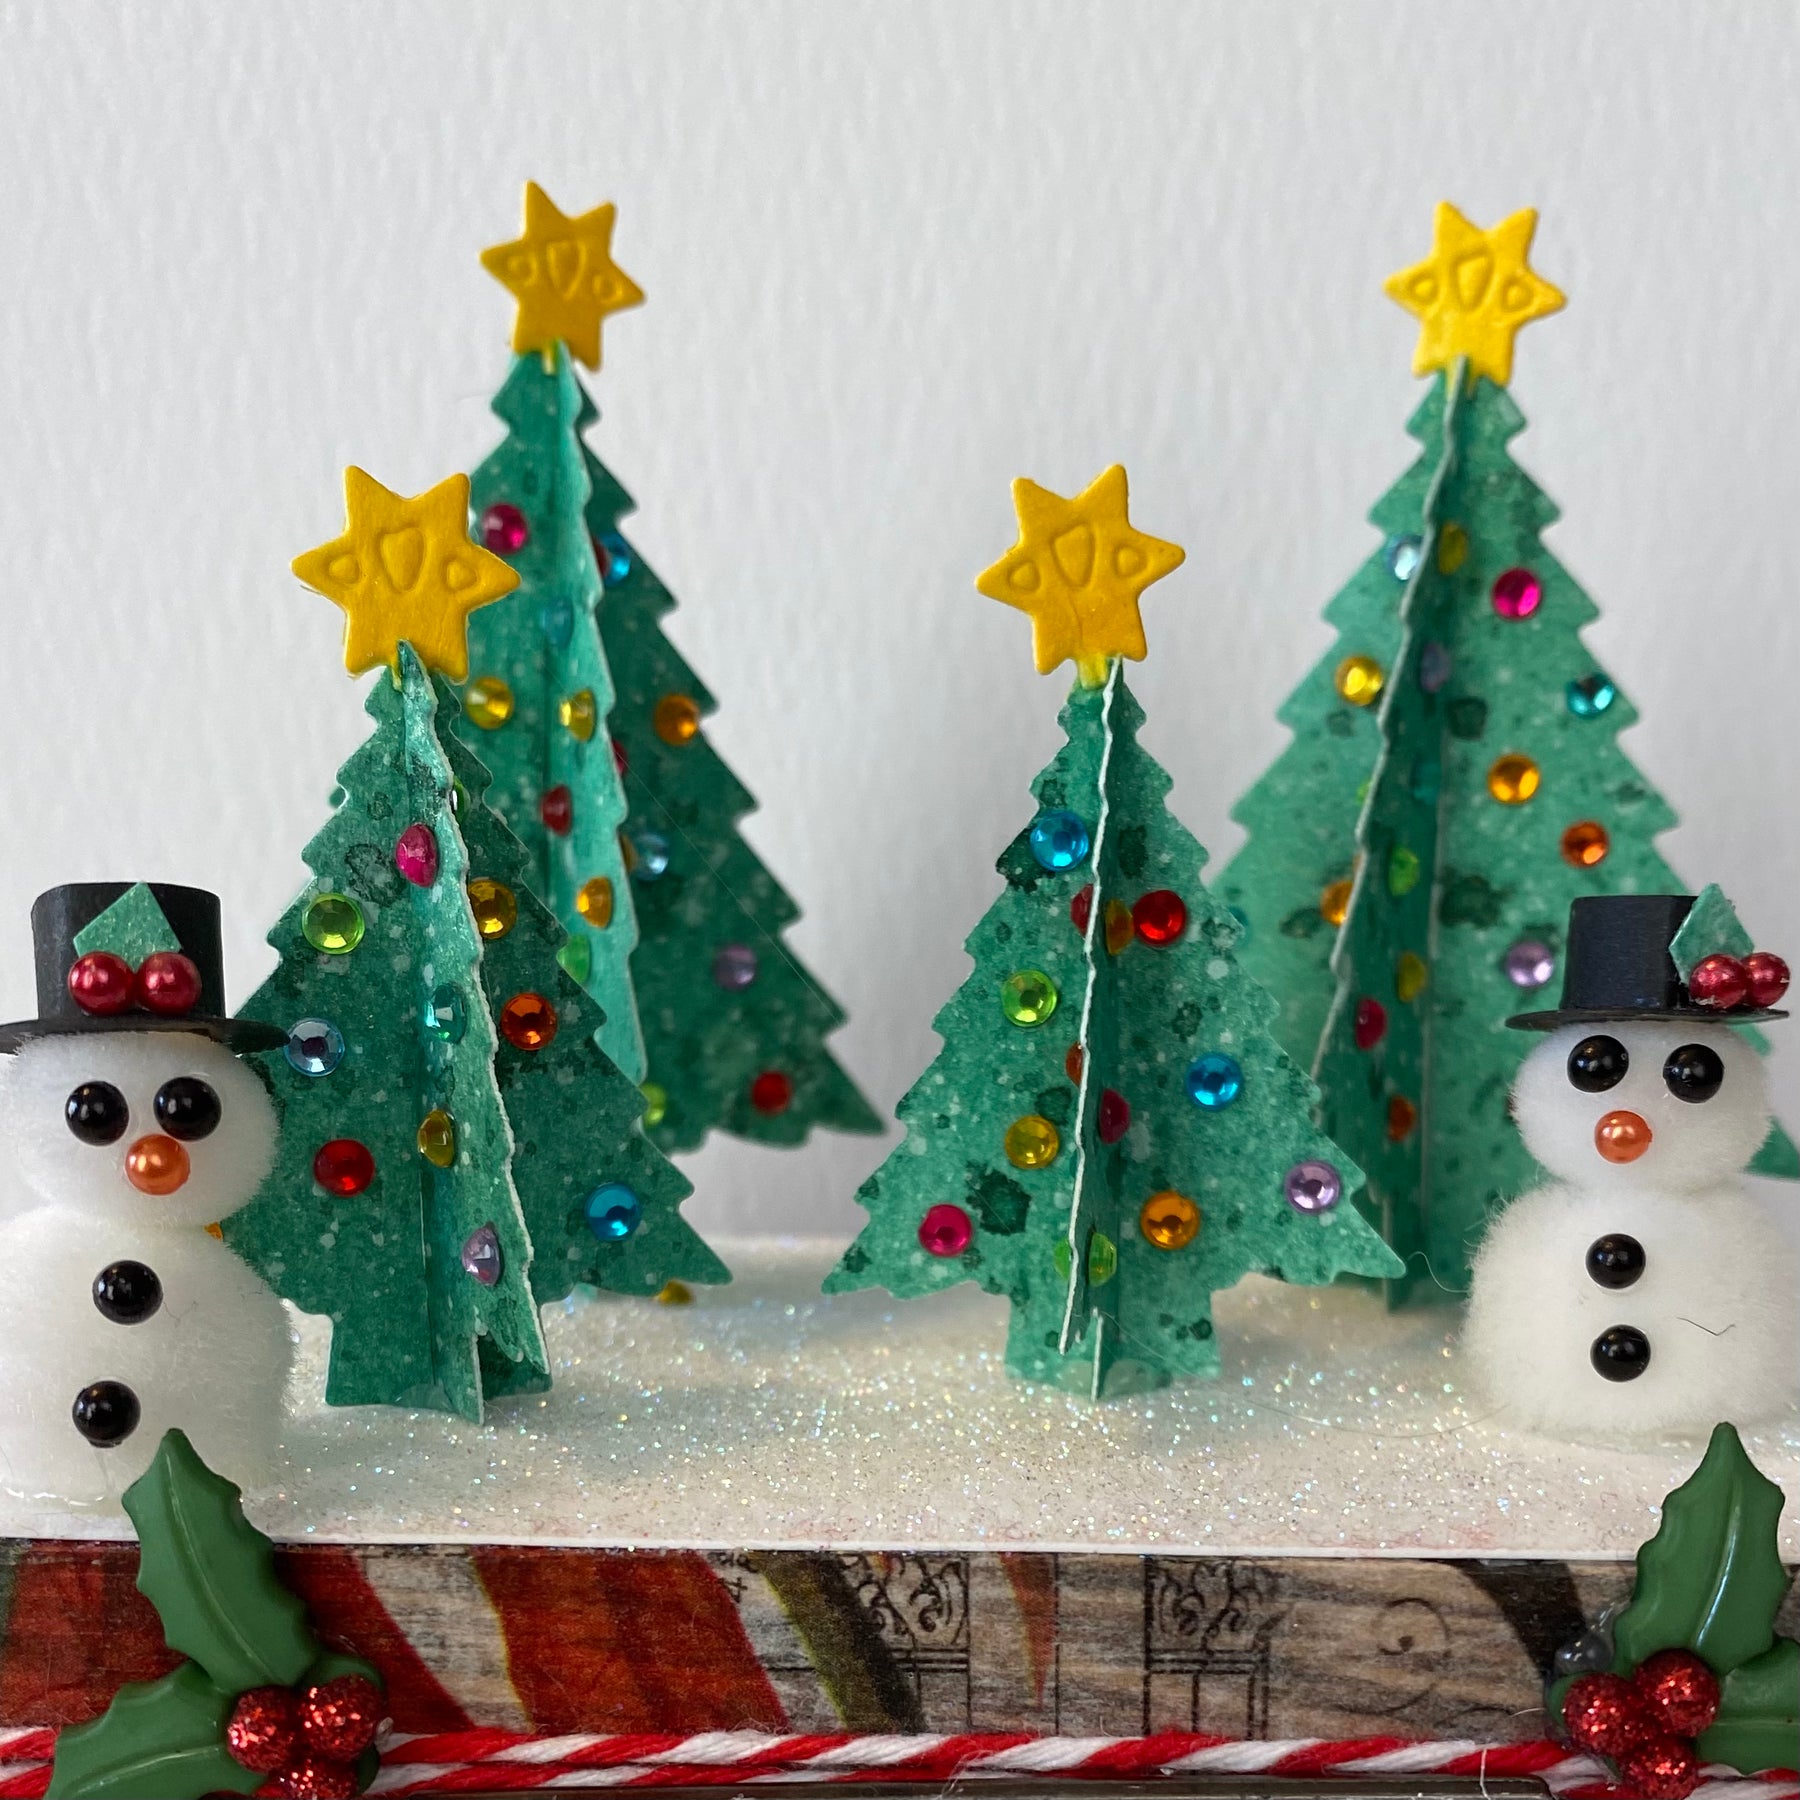
Time to decorate! Use jewel embellishments, liquid pearls, or whatever fun stuff you might have in your stash. The accessory die with the set also has an ornament and small star that can be cut in multiple colors for decorations.


Your trees are now ready to use in your holiday makes. The possibilities are endless! I made a little snow scene with some glitter and a few pieces from my collection.

Have fun and best wishes for a happy holiday season!
Leave a comment