Have you seen the Storybook forest release yet? It is so fun and one of my personal favorite is the Die of the Month-Snowglobe. Here are some of the projects that the team has created with it.
Shalana created a Birthday card by building a fairytale castle scene using the Die of the Month Club, Snowglobe die. She cut out the pieces of the scene using varying colors of cardstock. Once the scene was built using the circle shape she created patterned paper using the Plaid Shirt Mixed Media Layering Stencil. The center of the patterned paper was cut out using the circle die and a piece of acetate added to it. 3D foam tape was used to place the patterned paper acetate window over the caste scene. The Happy Birthday sentiment was heat embossed with Alabaster embossing powder and popped up to add dimension. Cute Birthday Card for a special little lady. Created by Shalana G @sglass1908
Candi ink blended all of the pieces to the Snowglobe Die to create her evening scene. For some added shine, she added some Enchanted Dragon Embossing Powder. She layered the assembled snow globe on a piece pattern paper from the of Vintage Plaid Paper Pad. Created by Candi V@sugarcards
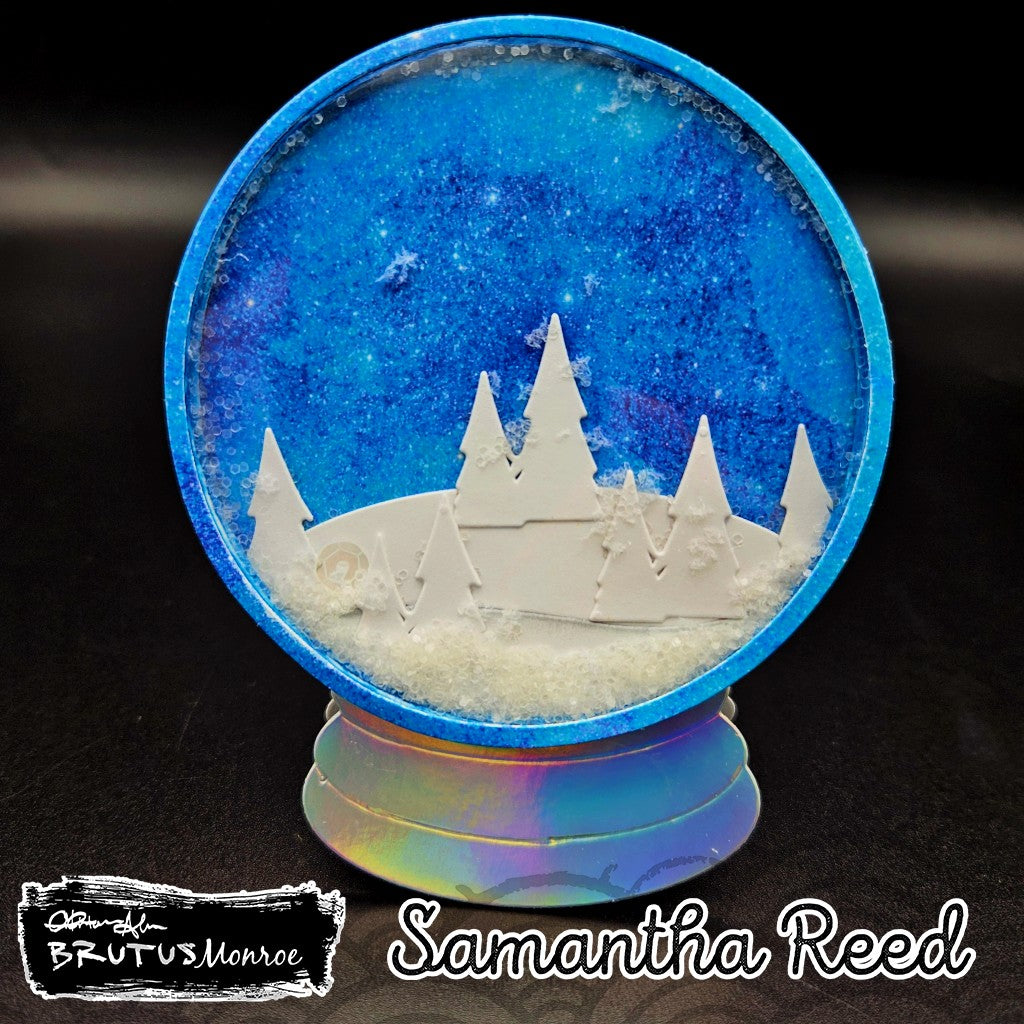
Samantha created this enchanted Winter Wonderland snowglobe that is also a shaker card. She die cuts the pieces from the April Die-of-the-Month "Snowglobe Cutting Dies" set. For the background skyscene, she used the "Watercolor Galaxy." The amazingly thickness of Not Your Mamas cardstock was perfect for the assembly of the stand alone shaker card as seen below. Created by Samantha Reed @samiamcards
Shalana created this fun Congratulations card with the intent of welcoming a family to their new home. She began by ink blending shades of pink using the Geometric Weave Slimline stencil. A few of the shapes in the stencil were outlined with a black journaling pen. She created a scene using the Snowglobe Cutting die. The sentiment "Congratulations" was stamped using the Super Sentimental stamp and Flat Back Crystals adhered to add flare to the card. Created by Shalana G @sglass1908
Donna created this Wizard of Oz Themed card using 2 Dies of the Month. She used the new Snowglobe die to anchor the tornado scene and the Oz and Ends to add the Wizard of Oz elements. The rainbow was created with Aqua Pigments and the background paper is from the Over the Rainbow paper pack. Created by Donna T. - @DonnaTCrafting

Walter created this magician’s crystal ball card using the Snowglobe Cutting Die set. He placed the top of a circle die (one size larger than the snowglobe die) just over the fold of an A2 card base and cut it out, which created a circular card base. He next cut two snowglobe bases out of Raven card stock and painted them with Penny Aqua Pigment. Walter then used the snoglobe die to cut a scene from a Storybook Forrest card panel, added some Unicorn Horn Glitter Glaze to it, and attached it to the center of the card base with double sided foam tape. The front and back stands were also attached to the card base with double sided foam tape. Walter used a detail blending brush to add a light coat of Lost Shadow Distress Oxide Ink around the inside of the shaker dome to add a cloudy effect and and glued it to the front of the card. Unicorn Horn Glitter Glaze was added around the edge of the shaker dome to add a mystical glittery glow. Walter stamped, colored, and cut a dragon and perched him atop the crystal ball.
Created by Walter Zemrock @zemstones.by.walter

Lori created this slimline card by cutting out the houses, castle, trees, and clouds from white cardstock. She ink blended the sky with Saltwater Taffy and Dusty Concord Distress Oxides. She stacked the houses and castle parts, and put white cardstock behind the houses to give the windows and doors an inlay appearance. She then added the sentiment. Card designed and created by Lori Wolfe @Coast_2_Coast_Cards

Shalana created a snowglobe featuring a few characters from the There's No Place Like Home stamp set. Pieces from the Die of the Month Club, Snowglobe were cut with varying card stock colors. The circle die from the set was cut out of Aqua Pigment watercolor paper. Finishing Glaze and Creamy Blue Aqua Pigment were mixed and spread on the globe shape to create a sky background. The Tin man, heart and dog were stamped, colored and fussy cut. The sentiment was stamped on the base of the snowglobe. To create a background specific shapes of the Geometric Weave Slimline Stencil were traced with a black journaling pen. The snow globe was put together and popped up with 3D foam tape. Created by Shalana G @sglass1908

Donna created this Beauty and the Beast Themed card using the Die of the Month. She used a retired Foilable panels pack (Flower Market) for the globe background and the overall background. However, you could use other foilable panels or even stamp (Rose Garden Stamp Set would be her choice) and use the Foil Reactive Embossing Powder. Or if you don’t want to foil, you could also use regular emboss powder for the background. The globe background was shaded using Aqua Pigments. You can watch how she made this card
here.
Created by Donna T. - @DonnaTCrafting

Samantha created this magical neighborhood using the new release: "Storybook Forest." The background was created with Aqua Pigment Watercolor Paper and Creamy Blue ink. For the hills, die cuts from the Snowglobe set were painted with combo of AP yellow and blue. The sun is from the Easy Element Dies set colored with combo of AP red and yellow. After Samantha assembled the scene as shown below onto the watercolor panel, she framed her creation using the Crosshatch Mixed Media Stencil and embossing paste. Distress inks were applied on the embossed image for a cobblestone texture/image. Created by Samantha Reed @samiamcards


Leave a comment