
Brutus Bucks Program
Check your Rewards Here!

Hello, today I am going to be using all of the smaller floral/leaf stems from the Lovely Ladybug stamp set. This is the set that came with the March Inspiration box. (The box has sold out but many of the items are available for purchase separately.) Many times we forget about the smaller stamps and there are some very fun florals in this 40 piece set.
I lined up all the stamps in the bottom of my Mini Misti and stamped them with Raven Detail Ink on my favorite paper, Perfect Blend Alcohol Paper. After stamping my images, I rotated the paper an stamped them on the other side. I repeated this for about 4 pieces of paper.

Next, I did some simple Copic coloring for the images. I used W1 for the Daisies and small white flowers/berries, Y08 for the middle of the Daisies. For the Pink flowers/berries I used RV02 and RV55. For the leaves I used YG63 & YG67. Once all of my images were colored, I used the Coordinating Dies to cut them out.
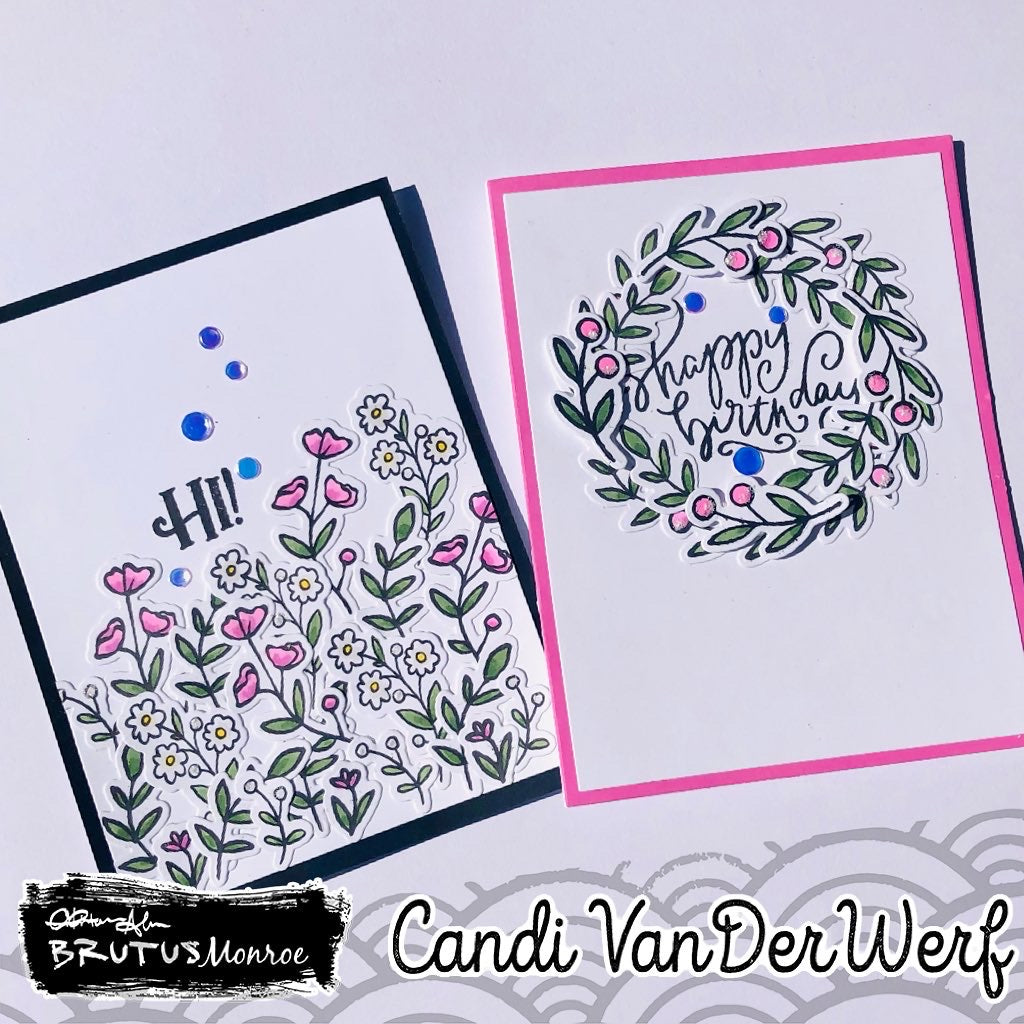
Using a white card panel (4" x 5.25" I lined up a circle die from my stash toward the top and then I arranged 4 of the leaf images and of the larger berry images alternating them on top of the die. I used some Press and Seal to hold my images in place, flip them over (still attached the the Press and Seal) and then added liquid glue over the back of the images. I carefully flipped them back over (after removing the die cut (which I only used for shape and placement) and peeled back the Press and Seal. Because I used liquid glue, I had time to arrange any piece that might have moved. Then, I used the tip of my Bearly Art Glue to adhere any overlapping images.
For a sentiment I used a Happy Birthday from the Extra Sentimental Set and stamped that in the center of my wreath with Raven Detail Ink. I ended up not getting a clean image, so I restamped the sentiment on some more Perfect Blend Alcohol Paper and cut it out with the same circle die I used for placement. I adhered it over the center, which covered up part of my wreath. I stamped out extra images, colored them like before and die cut them out. I used some Easy Tab Foam dots (cut in half) to pop up the flower/berry images overlapping some of the images below. Then I used liquid glue to fill in the rest of the wreath with some of the leaf images.
I matted the entire panel on a 4.25" x 5.5" pink card mat. Then I attached it to my top folding A2 Cardbase. Finally, I added some Stickles on the pink berries and attached a few iridescent confetti sequins around my sentiment.

For my second card, I arranged the flower images all across the front of my white 4" x 5.25" card panel. I used the same method with the Press and Seal to hold the images in place. After I attached the liquid glue to the images and carefully flipped them over the card panel, I carefully removed the Press and Seal. This time I had images that were on top and did not have any glue. I manipulated the few that need to be nudged before the glue dried. Then I added the rest of my images on top, filling in gaps etc. I cut off any that were over hanging and put it in my Misti.

My sentiment comes from the Super Sentimental stamp set and I stamped it nestled in the flowers with Raven Detail ink. Next, I matted the panel on a Raven black mat that measured 4.25" x 5.5". I adhered the entire thing to another A2 card base. Finally for some bling, I added some stickles to the white tiny flowers, and then sprinkled some iridescent confetti sequins.

I hope you enjoyed these cards, and will think about the small stamps in your sets that can be used to make fun cards like this. If you would like to see the YouTube video, click here.
| Item | Price | Qty | Total | |
|---|---|---|---|---|
| Subtotal |
$ 0.00 |
|||
| Shipping | ||||
| Total | ||||
Leave a comment