Brutus Bucks Program
Check your Rewards Here!
Fall is my favorite time of the year. I’m not sure if it is the crispness in the air or a throwback to the old back-to-school time and new beginnings. I grew up in SoCal so seasons really just meant months on the calendar. When I lived in New York City, for the first time I experienced four distinct seasons and really connected with autumn followed closely by winter. The colors, the crunch, the coolness, the relief from the humidity, the sweaters — it all added to up to just flat out loving fall.

I am having fun playing with the Welcome Fall stamp set that was included in the Brutus Monroe Autumn Inspiration Box. Since I didn’t have any bold red or orange ink I opted for a softer look. For the “Welcome Autumn” card I started with ivory parchment cover stock, using strips longer than the finished length of the 6 x 6 Kraft paper from the Natural Elements Paper Pad. I like being able to trim pieces to get the images I want in the finished look. I did the first “leafy” section of the stamp using Premium Chalk Ink in Sage — stamping vertically higgledy-piggledy — overlapping the image slightly as trees do when they are in groves. I then overstamped the tree tops with Premium Chalk Ink in Rouge, offsetting this color slightly. I let the ink dry and then stamped the bare trunks and branches using the Brutus Monroe Detail Ink in Raven. Happy with the soft color of the trees after it dried completely (it was a bit muddy looking until it dried) I lightly spritzed Liquid Elements in Guilded. While I like the outcome, when I started putting the cards together, I was wishing that I had spritzed the gold a little heavier. I used the bold sentiment from the stamp set and spritzed it after I stamped. I framed the stampings in a polka dot from my paper stash and taped them to the kraft background. Oh, I added the narrow grosgrain ribbon before I taped the stamping, wrapping it around the back of the kraft cardstock. I then put it all together on the 6 x 6 card and…there you go. Welcome Autumn!
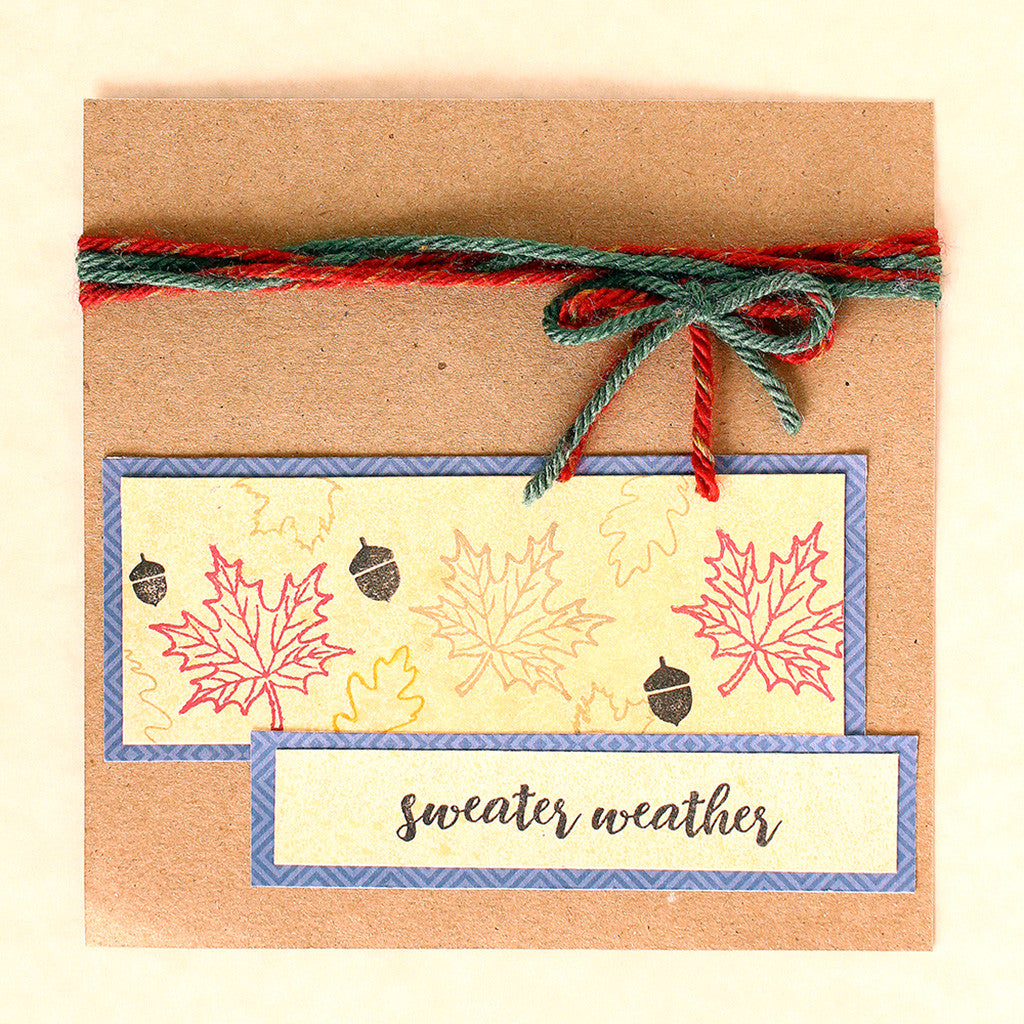
Using the leaf stamps from the same set I stamped a scatter or bigger leaves and smaller leaves. Really simple — using Premium Chalk Inks in Aubergine, Sage and Sea. I used both sizes of acorns, stamping them with the Detail Ink in Raven. This time I used the Sweater Weather sentiment and when everything was dry I did the light spritz of the Liquid Elements Guilded. I like the overspray as it glints on the little acorns. I’m not sure if I would have liked a heavier application of the spray on this design. I will try it and see; but I am pretty happy with the subtle look of it here. I framed the printed pieces with a tiny blue print from my paper stash and taped the pieces in place. To give the card the final touch I used yarn in blue and a color called Autumn from my knitting basket, wrapping it a few times around the card, finishing the wraps with a bow. I did put a bit of tape under the bows to hold the yarn in place. (Note to self — order some glue and tiny nozzle to add to my studio tool basics!) I do like this card the best — I think it speaks to my love of fall with both the sentiment and the yarn. I will be making more of these with slight variations to send to my family and friends as the season rolls around — hurry, hurry, hurry!

Honestly, it was so easy and I think they are both really cute while not being really complicated. The quality of these stamps amazes me — the detail is divine. And, now that I have had a bit of practice with the stamping “size and pressure equation,” I seem to have fewer “whoopsies!” I didn’t use all the stamps in the set (it’s true — it has a lot of stamps) so I will be experimenting with them and report back. Oh, I did try the solid maple leaf in the set, using the same overstamping technique I used on the treetops — but couldn’t get it right. It seemed to "smoosh" instead of stamp. Too much ink or pressure? I will definitely be trying to figure that one out. Luckily for me…I am one of those people who doesn’t mind when things don’t turn out exactly as I planned. Somewhere in life, I learned that the fun is in the discovery — to “see what happens when” — that thinking is a bit challenging for the perfectionist side of my personality; but after all these years, I somehow mange to get them to play nice most of the time!
I just had a thought — what if I spritzed the Guilded over the kraft cardstock before I applied all the pieces? And, how can I use the Alabaster in with it all? Embossing inks and powders? And, how many more layers of paper can I add without it being too many? And, how can I use these stamps on a smaller format card? Can I use them in my planner? Head spinning…stay tuned.
Note: All products used are Brutus Monroe -- with the exception of the tape, ribbons, yarn and parchment paper.
| Item | Price | Qty | Total | |
|---|---|---|---|---|
| Subtotal |
$ 0.00 |
|||
| Shipping | ||||
| Total | ||||
Leave a comment