Brutus Bucks Program
Check your Rewards Here!
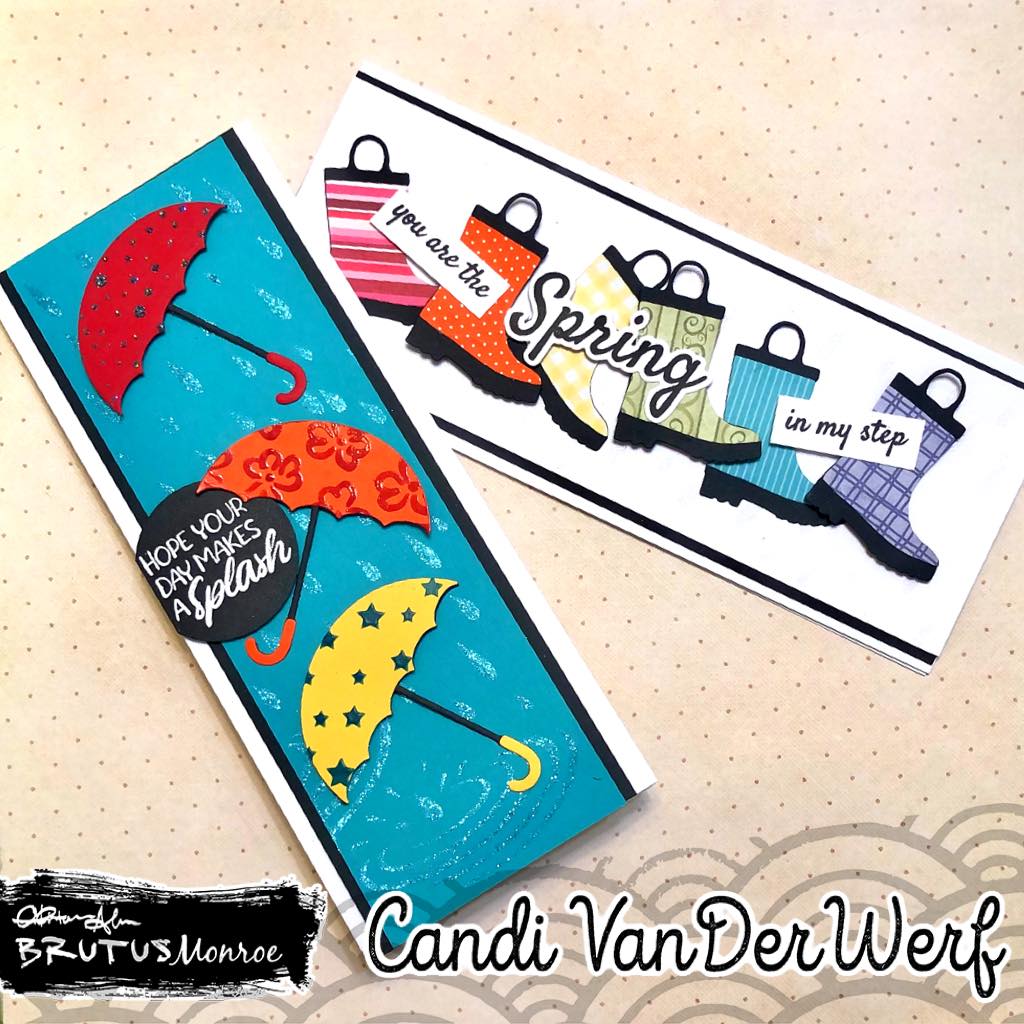

Today I bring you to Slimline cards using the Puddle Jumping (March Die of the Month). These cards used a variety of Brutus Monroe products. All paper for the cards came from my scrapbin (except the card bases, which are our precut slimline card bases).

You are the Spring in my step
First cut out all the boot bases with a black cardstock and the top layer from a rainbow of scrap pattern paper and adhere with liquid glue. For the card panel, I combined the Spring Showers stencil with Alabaster Glitter Glaze just using the raindrops for some interest and sparkle. Once it was dry I attached it to a black mat and attach both to the card base.

Arrange the boots in rainbow order and use foam adhesive like our easy tab foam dots on every other one. Using the Sentimental Spring stamp and coordinating dies, stamp the desired sentiment with Raven detail ink and adhere to the front of your card to finish it off.
Hope your day makes a Splash

For this card, I used a piece of teal scrap and the Hyacinth Glitter Glaze over the Spring Showers stencil. I started with the bottom and let it dry and then lined up the top of the stencil and just spread the glaze over the raindrops to continue the pattern.

I die cut the base from black scraps and the handle and tops from Red, Orange and Yellow Scraps. For the Red top, I used a dot stencil from my stash and Raven Glitter Glaze. For the Orange one, I used Bountiful Blooms (now retired) and Purple Chroma Glaze and the Yellow umbrella I used Teal Taffy Velveteen Glaze and Starry Night stencil. One the glazes were dried, I adhered the umbrellas together and placed them on my dry panel. For dimension I used pop dots under the top portion of the umbrellas only.
I matted the panel with black cardstock and placed the whole thing once again on our Precut Slimline card bases. For my sentiment, I used an older stamp from my stash and heat embossed it on black cardstock. I first stamped it in Alabaster Pigment ink and then covered it with Alabaster Embossing powder. After cutting it out with a Circle Foundation die, I glued it to the base to finish my card.
I created these cards during a live on the Brutus Monroe Youtube channel and you can watch the video on how I made these cards here
| Item | Price | Qty | Total | |
|---|---|---|---|---|
| Subtotal |
$ 0.00 |
|||
| Shipping | ||||
| Total | ||||
Leave a comment